Color My World

Batch #3....paint chip cookies! I made these cookies for my cousin, Meg. There are several "paint chip collectors" in the family, but Meg is the only one I know of who actually does something with them!
Take a peek at her blog and some of the cool things she does with paint chips....I love her cards and cd covers. You should have seen her paint chip Christmas card!!! It is saved in my box of Christmas treasures.
To make these cookies, I made a trip to Lowe's to do a little research. :) I think the Martha Stewart colors have the best names. (Last year, we painted our guest room in Martha's "buttermilk biscuit.")
Once the cookies were made, I let them dry overnight then added the color names and numbers using AmeriColor Gourmet Writers food coloring pens. I love these and AmeriColor makes pens with the finest tip I have seen so far.
SHARE:

Cookies from art

So, here is batch #2 of cookies from our trip. These cookies were for my cousin Maura. She is an amazing artist, so I used her artwork and made cookies from it.
I love this skeleton bride and groom! I thought a bride & groom needed a scalloped edge cookie. :)

Isn't this blue bird so sweet?!? I love the little orange beak and feet! (Hey...that rhymes!)
For both of the cookies, I scanned notecards that Maura made (her etsy store is closed now, but if/when (?) she re-opens it, I'll let you know...you'll want some of your own). To make photo or art cookies:
  1. Make sure you have a really talented cousin! :)
  2. Scan the image to be used (make sure you have permission!) and use a photo editing program to crop to fit the cookie. I use the crop tool and image size and view on 100% to see the actual size of the picture. Hold your cookie cutter up to the screen to check.
  3. If you are lucky enough to have an icing printer, print on icing sheets. Otherwise, burn the images onto a CD (my techno-speak is not great, hope I said that right!) and take to a bakery supply store to have printed with edible ink.
  4. Cut the images from the icing sheet, but leave the backing intact.
  5. Outline and fill cookies in white icing.
  6. While the icing is wet, remove the backing from the image and lightly place onto the cookie.
  7. Let dry at least 24 hours...not just overnight...24 hours! These take a while to dry, I think the moisture gets trapped under the image.
  8. Mix a little meringue powder with water.
  9. Using a small paintbrush, apply this mixture around the edges.
  10. Sprinkle with non-pareils; shake off excess.
  11. Let dry.

SHARE:

Taking flight

My son & I just returned home from a wonderful trip to visit my aunt, uncle and two of my cousins....some of my favorite people in the whole world! We took a few cookies along with us, so here's a look at batch #1.
These monarch cookies were for my Aunt Janice. I am so, so happy that my uncle had the smarts to marry her! :) I'll bet that every one of my friends knows "Aunt Janice" because I frequently talk about her...she is one cool cookie!

One of the many things my aunt does well is garden, especially butterfly gardening. The design inspiration for the cookies came from Karen Tack's Hello, Cupcake! book where she uses candy melts to make a butterfly cupcake topper. I like the way they looked tied with the dotted grosgrain. To make the cookies:

  • Using a #5 tip, pipe the butterfly body in black. (Spectrum Super Black)
  • Switch the tip on the black icing bag to a #2 and pipe the outline of the wings.
  • Thin black and orange icing with water to a syrup-like consistency and cover both with a damp dishtowel. Let sit several minutes. (AmeriColor Orange mixed with a little Spectrum Super Red)
  • Run a rubber spatula through the icings to pop any bubbles that formed on the top. Pour into 2 separate squeeze bottles.
  • Using the thinned black icing, follow the outside edge of the wing outline.
  • Immediately fill with thinned orange icing, filling in the remainder of the wing, making sure the black and orange icings meet.
  • Using a toothpick, drag the black icing into the orange, making veins in the wings.
  • While the icing is still wet, drop on white non-pareils.
  • Let the wings dry for an hour or more.
  • If desired, go back over the butterfly body using a #5 tip in black icing.
SHARE:

got icing?

Just a little peek at the icing I made last night. One of the things I love about royal icing is that is can be made ahead of time. I've heard a week or more, but I never plan that well. This icing is for cookies I'm making today and tomorrow.

Once the icing is made and tinted, I press a sheet of plastic wrap on top of the icing, then cover and refrigerate. When I'm ready to use it, I just bring it to room temperature.
....and here's my helper sneaking into a picture of goodies from a trip to the bakery supply store. I am so happy to have a stash of my beloved Ateco meringue powder! I hate that Sur La Table quit carrying it! Ooooo...and I was really excited to find black non-pareils! :)
SHARE:

Little Sweet Pea

Our neighbors just had a baby girl, so we brought them a batch of sweet pea...or pea in the pod...cookies.
I guessed a blond-haired baby. The mom is blond and so is big sister, but when we delivered the cookies, we saw the baby is an adorable little redhead! Well, after the cookies are eaten, there won't be any evidence that I picked the wrong hair color. :)

I used AmeriColor Gourmet Writer food coloring pens to make the eyes and mouths on the cookies.
SHARE:

For the hostess with the mostest . . .

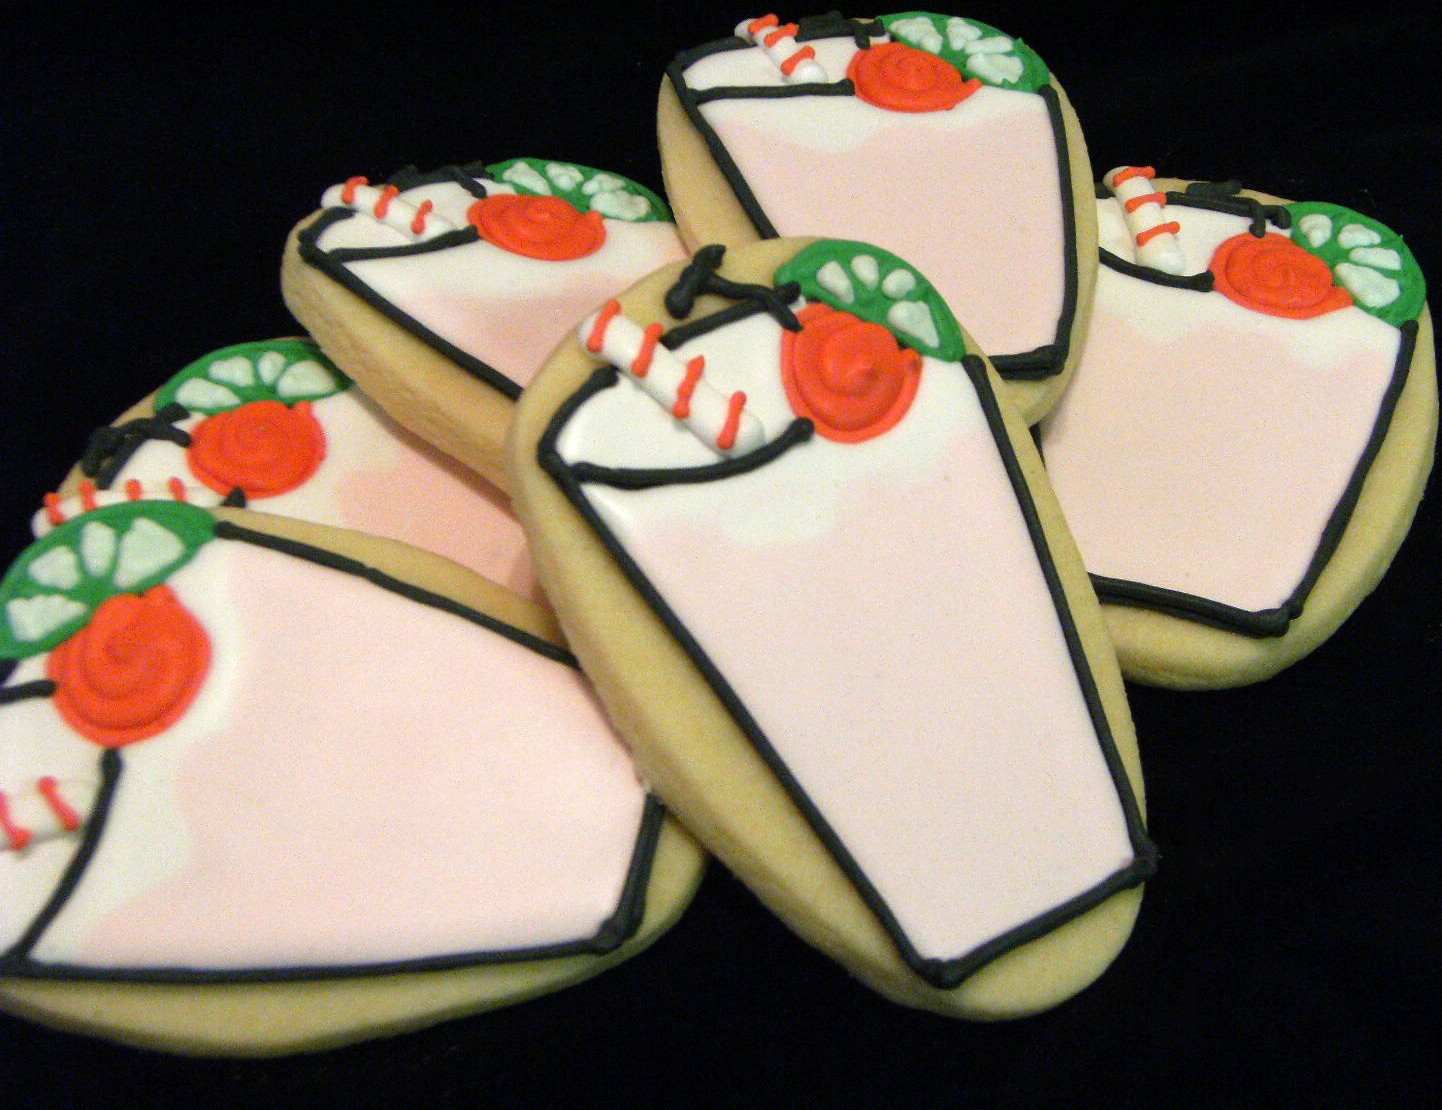
Texas hospitality is nowhere more evident than in my dad's neighborhood in Amarillo. When my son and I visited recently, a "come on over and use our pool" invitation by dad's friends, Kim & Vance, turned into an impromptu 5-hour pool party! Kim 
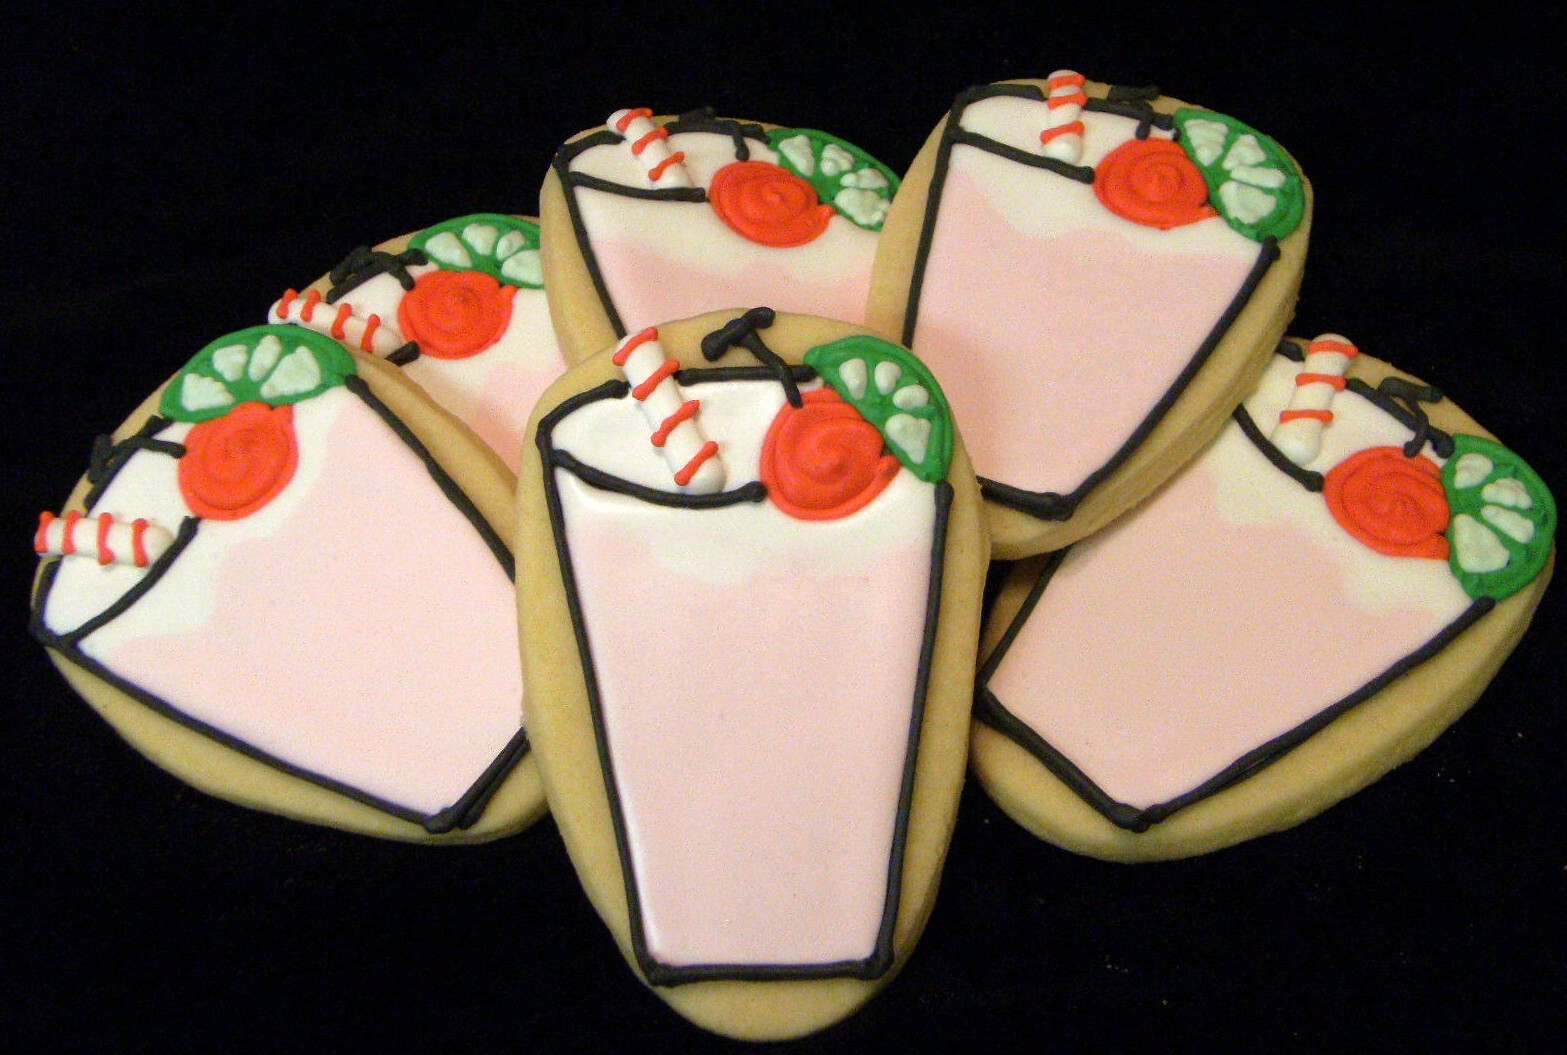
forced me (ok...not really) to have a few (3, 4, 10?...I lost count) of her poolside cocktails. I wanted to make cookies for her inspired by her drink. (It is a perfect summer/poolside drink: cherry 7-up, lime juice and vodka over ice...it beats the Texas heat, let me tell ya!)

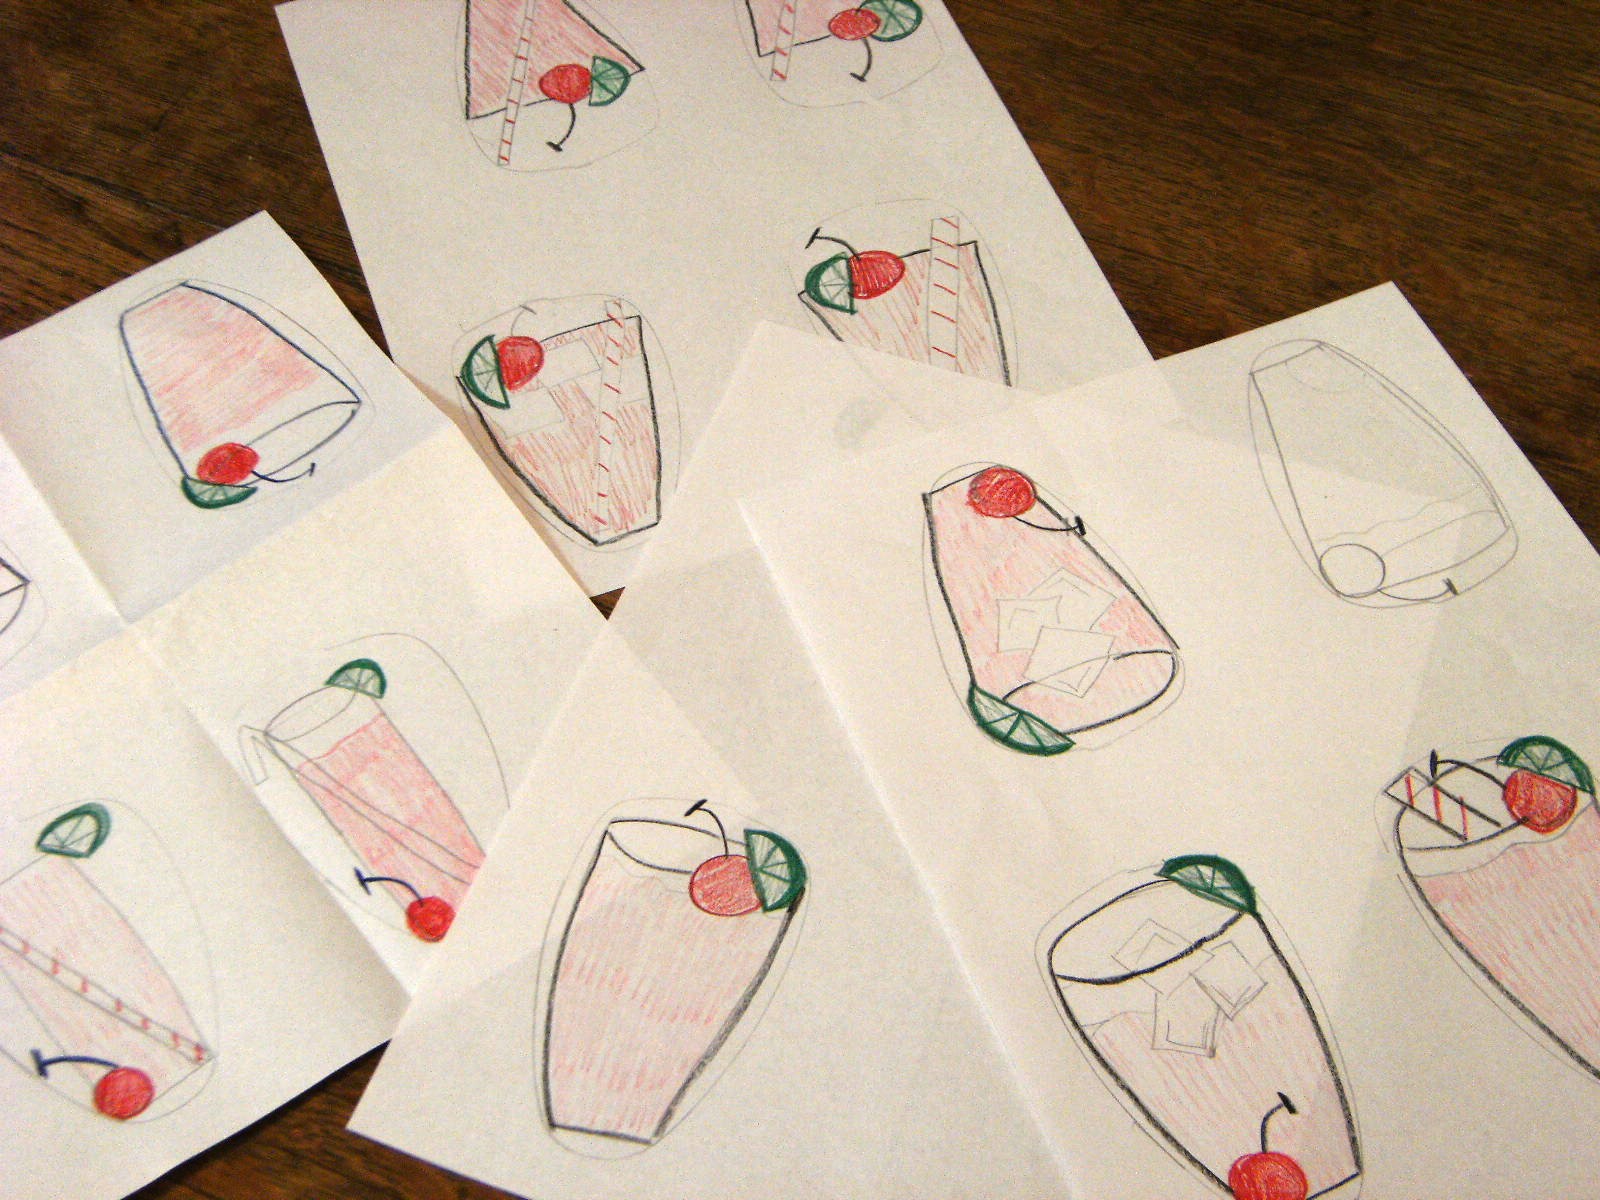
I used my candy corn cookie cutter for these cookies. Here's a peek at just some of my drawings. I threw about half of the pages away before thinking to snap a picture. Sometimes, what is in my head just won't translate to the paper!
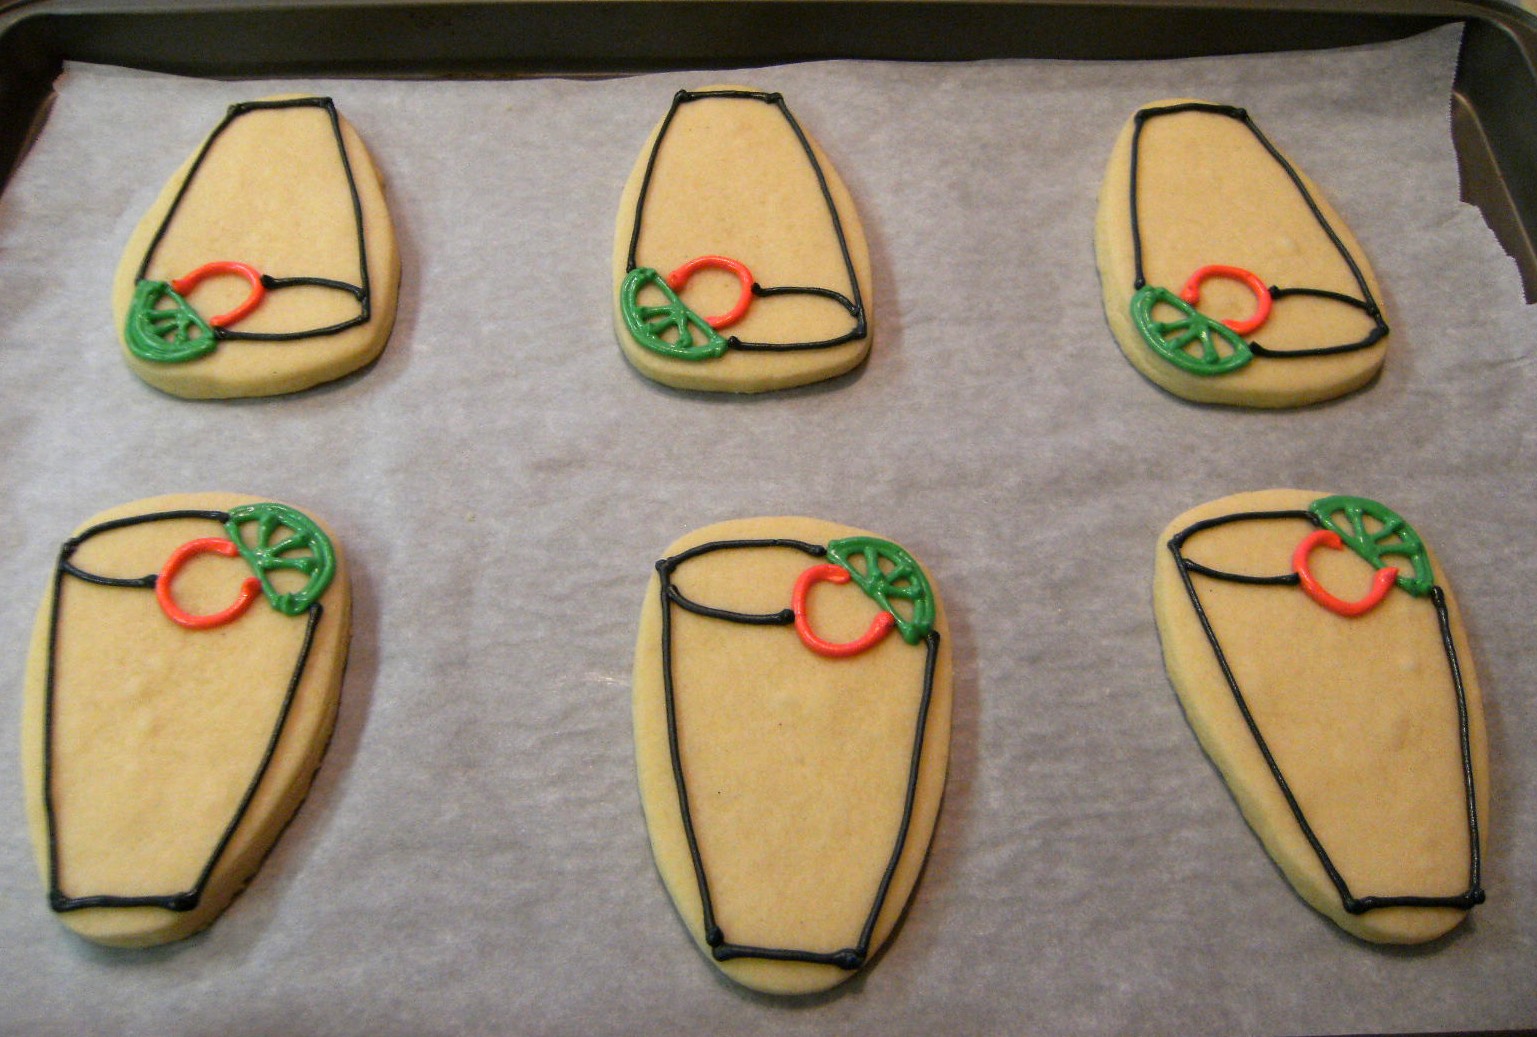
  • With a #2 tip, pipe the outline of the lime in one corner. (AmeriColor Leaf Green)
  • With a #3 tip, pipe the outline of the cherry in red, meeting up with the lime outline. (AmeriColor Super Red)
  • Using the lime as a guide for the corner of the glass, pipe the outline of the glass in black using a #2 or 3 tip. (Spectrum Super Black)
  • Thin white and light pink icing with water to a syrup-like consistency and cover both with a damp dishtowel. Let sit several minutes. (AmeriColor Soft pink with a smidge of Spectrum Peach)
  • Gently stir the white icing with a rubber spatula to pop any air bubbles that have risen to the surface and transfer to a squeeze bottle.
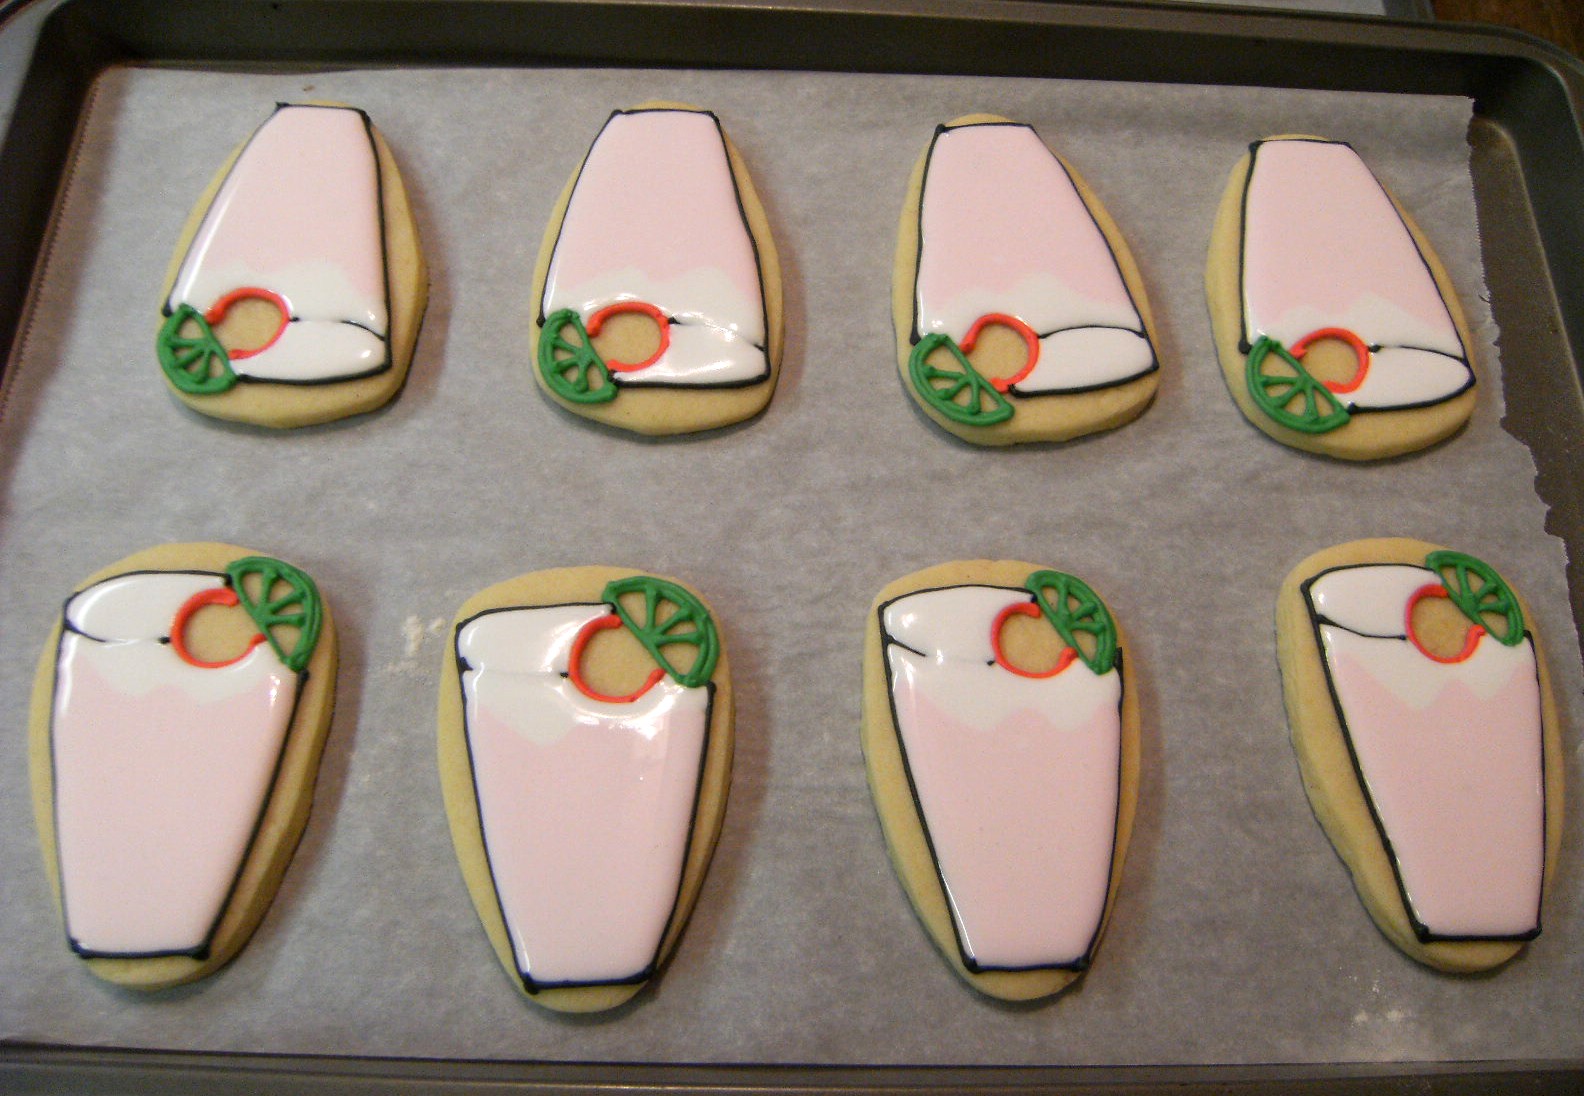
  • Fill in the top of the glass with the white flood icing.
  • Stir and transfer pink icing to a squeeze bottle.
  • Working with 6 to 8 cookies at a time, flood just below the glass "rim" with an uneven line of white icing.
  • Go back through your 6 to 8 cookies and flood with the pink icing butting up against the wet white icing.
  • While this is drying, add light green to the lime wedges using a #1 tip (or thin to flood). (AmeriColor Leaf Green)
  • Using a #3 tip, fill in the cherry outline (or thin to flood).
  • With a #46 basket weave tip, pipe the straw in white (un-thinned icing). Smooth side of the tip facing up.
  • If the flood icing has come up over the glass rims, like mine did, go back over the glass rim in black outline icing.
  • Switch the tip on the black icing to a #1 and pipe on the cherry stem.
  • Using a #1 tip, pipe stripes on the straws in red icing.
SHARE:
Blogger Template by pipdig